
The Sourdough Reset - Part 2: How a Cinnamon Swirl Finally Broke My 10-Year Fail Streak
After nearly a decade of fuzzy, grey-green failures, I finally felt ready to give sourdough another go—but this time, I knew I needed some help. This one is a bit of a read, so let’s work through the process and how I used Gemini to help me on the path to finally keeping a starter alive and baking my first sourdough loaf in years.
In Part 1, I shared how I stopped repeating the same vague recipes and instead treated my starter as a logic puzzle. Against a -22 degree Alberta snowstorm, I partnered with Gemini to evaluate every specific variable of my kitchen environment rather than just "hoping" for the best.
The 24-Hour Check-In: A Quiet Success
The first 24 hours were honestly pretty uneventful. Following Gemini’s guidance, I hydrated the starter and moved it into the microwave—door propped so the light stayed on—to create a stable incubator. Since I’d misplaced my Weck rubber band and lid, I used a coffee filter "hat" as a temporary hardware hack to allow for oxygen exchange.
During this initial setup, I immediately ditched the traditional method of tracking growth. I started using a dry erase marker to mark my original starter line on the glass. Why would I use a rubber band and fuss with it when it’s annoying and unnecessary? If you are trying this at home, skip the elastic and grab a marker—it is a total game-changer.
For the initial "jumpstart" phase, I used a high-nutrient "engine" recommended by Gemini:
- 85g starter
- 50g water
- 50g whole wheat bread flour
Over the next few days, I executed a taper ratio, gradually shifting from that heavy whole wheat base to a mix of 45g all-purpose and 5g whole wheat to keep the colony happy and established.
Hardware Audits: Filters vs. Lids
By mid-week, the "coffee filter vs. lid" conversation got interesting. A friend warned that the filter could promote mold—the very ghost that haunted my past failures. Gemini’s audit, however, highlighted a different variable: the frigid and dry winter air.
While the filter allowed the starter to "breathe," it was letting too much moisture escape. I was having to peel off a layer of dried-out starter every single day!
The Fix: I finally hunted down the original Weck lid and rubber ring. The logic was simple: in a dry climate, a seal is your best friend.
I also asked Gemini about those dried bits left on the jar sides. It turns out that even if they look dry, residual moisture and "capillary action" from the starter "breathing" can turn those bits into a breeding ground for bad bacteria. Clean sides aren't just for the "aesthetic" baker; they're a bio-security measure for your colony!

The "Life Happens" Variable
Let’s be real: during the first 10 days, I totally forgot to feed the starter for two days because life got busy. Instead of throwing it out, I tucked it in the fridge. Gemini’s recovery protocol was a breath of fresh air: just bring it back to room temp and feed as usual. No panic required.
The Breakthrough: Catching the Peak
I almost missed my first bake window! I set the oven to "Proof" and fed the starter, but it was taking its sweet time. We had dinner plans, and by the time I got home, it had already risen and fallen.
The next day, I was ready. About four hours after feeding, the dry erase line showed the starter hadn't quite doubled, but because of the bulb shape of the Weck jar, I suspected it was ready. I tried the Float Test: I dropped a spoonful into cool water, and it floated. The bacteria were finally producing enough CO2 to lift a loaf. After a decade of failure, we had lift-off.

Engineering the Perfect Recipe
When it came time to actually bake, I partnered with Gemini to develop a Cinnamon Swirl loaf tailored to my specific constraints. My initial prompt outlined the stage of my starter, the exact ratio I had on hand, and my lack of proofing baskets.
Pro-tip: It is critical to correct GenAI models when they slip up. At one point, Gemini presumed my "85g" was the totalmixture weight rather than 85g of active starter. Not catching that would have led to a failed bake.
We discussed using honey as a humectant to keep the bread moist and adjusted the hydration levels to ensure an airy loaf vs. a dense one. I even hit a snag when a "skin" formed on the dough while rising in the bread machine. Gemini to the rescue: a bit of water on the skin, a 15-minute rest, and I was back in business.
The "Lazy" Bread Machine Win
I didn't want to spend my weekend doing manual "stretch and folds." I dumped everything into the bread machine, let it handle the heavy lifting, then divided the dough into three mini-loaves to ensure an even bake.
- The Swirl: I rolled them out, hit them with a brown sugar cinnamon dry rub, and did a double-direction roll.
- The Cold Proof: They spent the night in the fridge.
- The Bake: Straight into a hot, steamed oven the next morning.
The Verdict
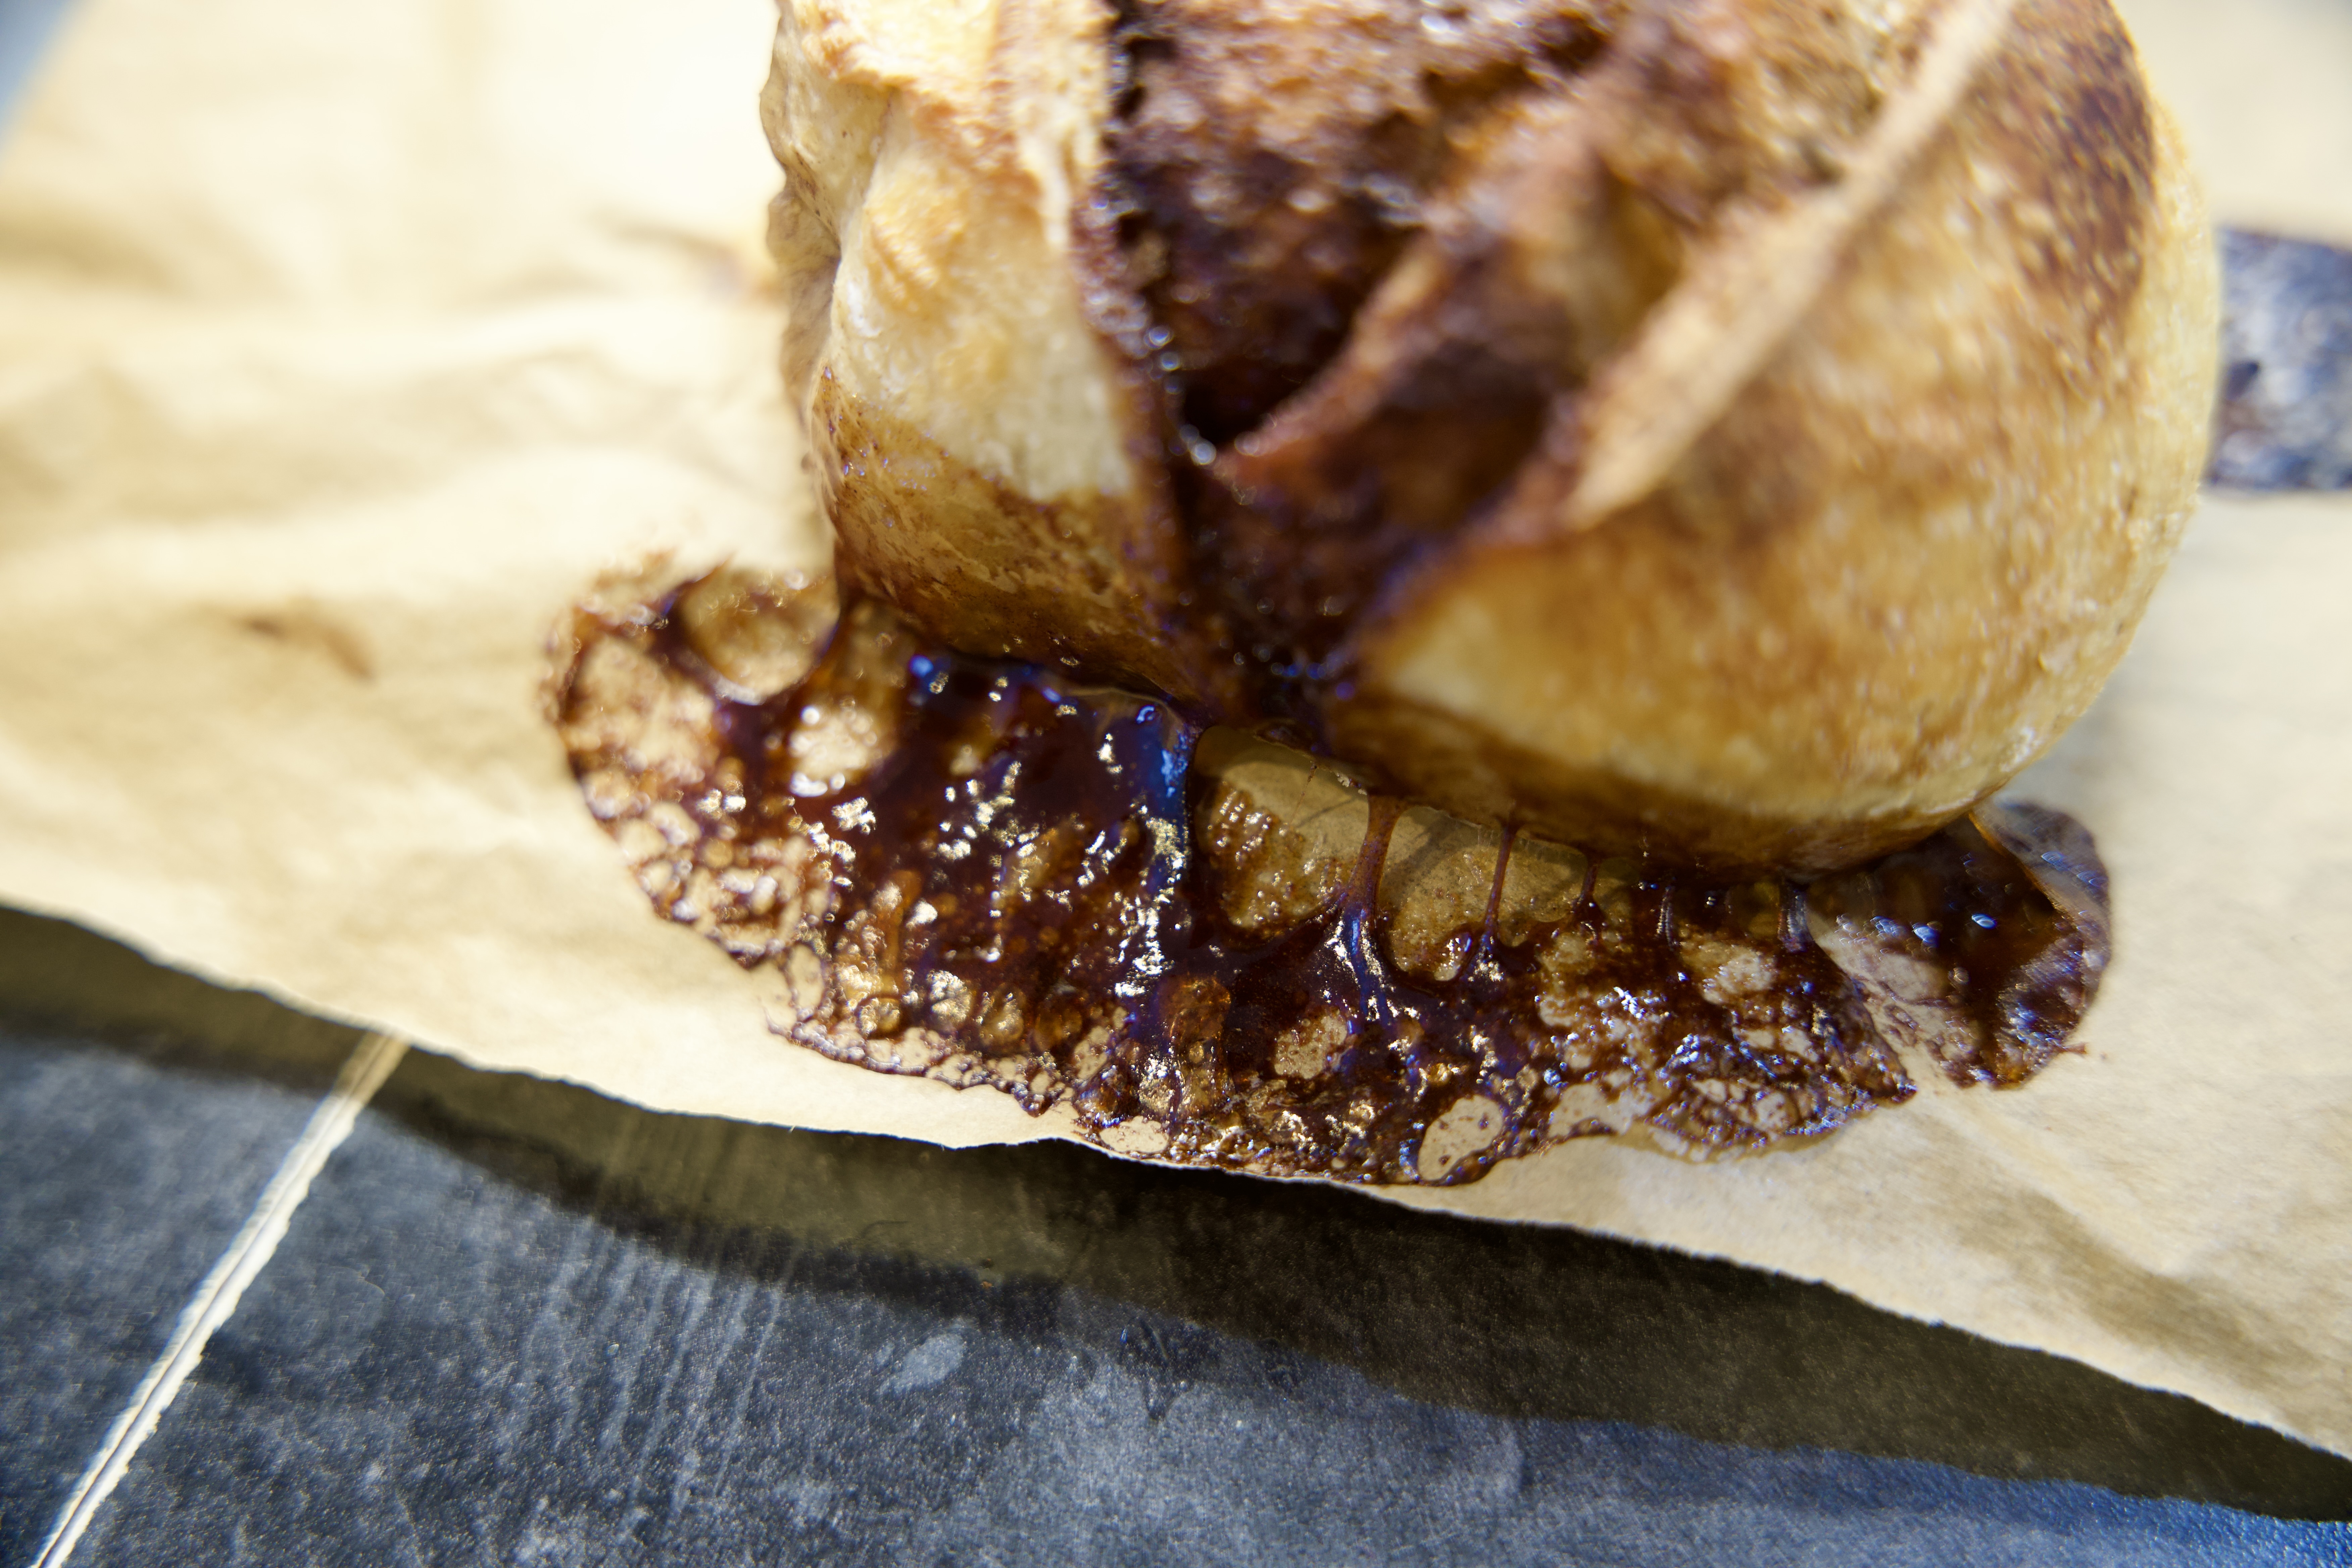
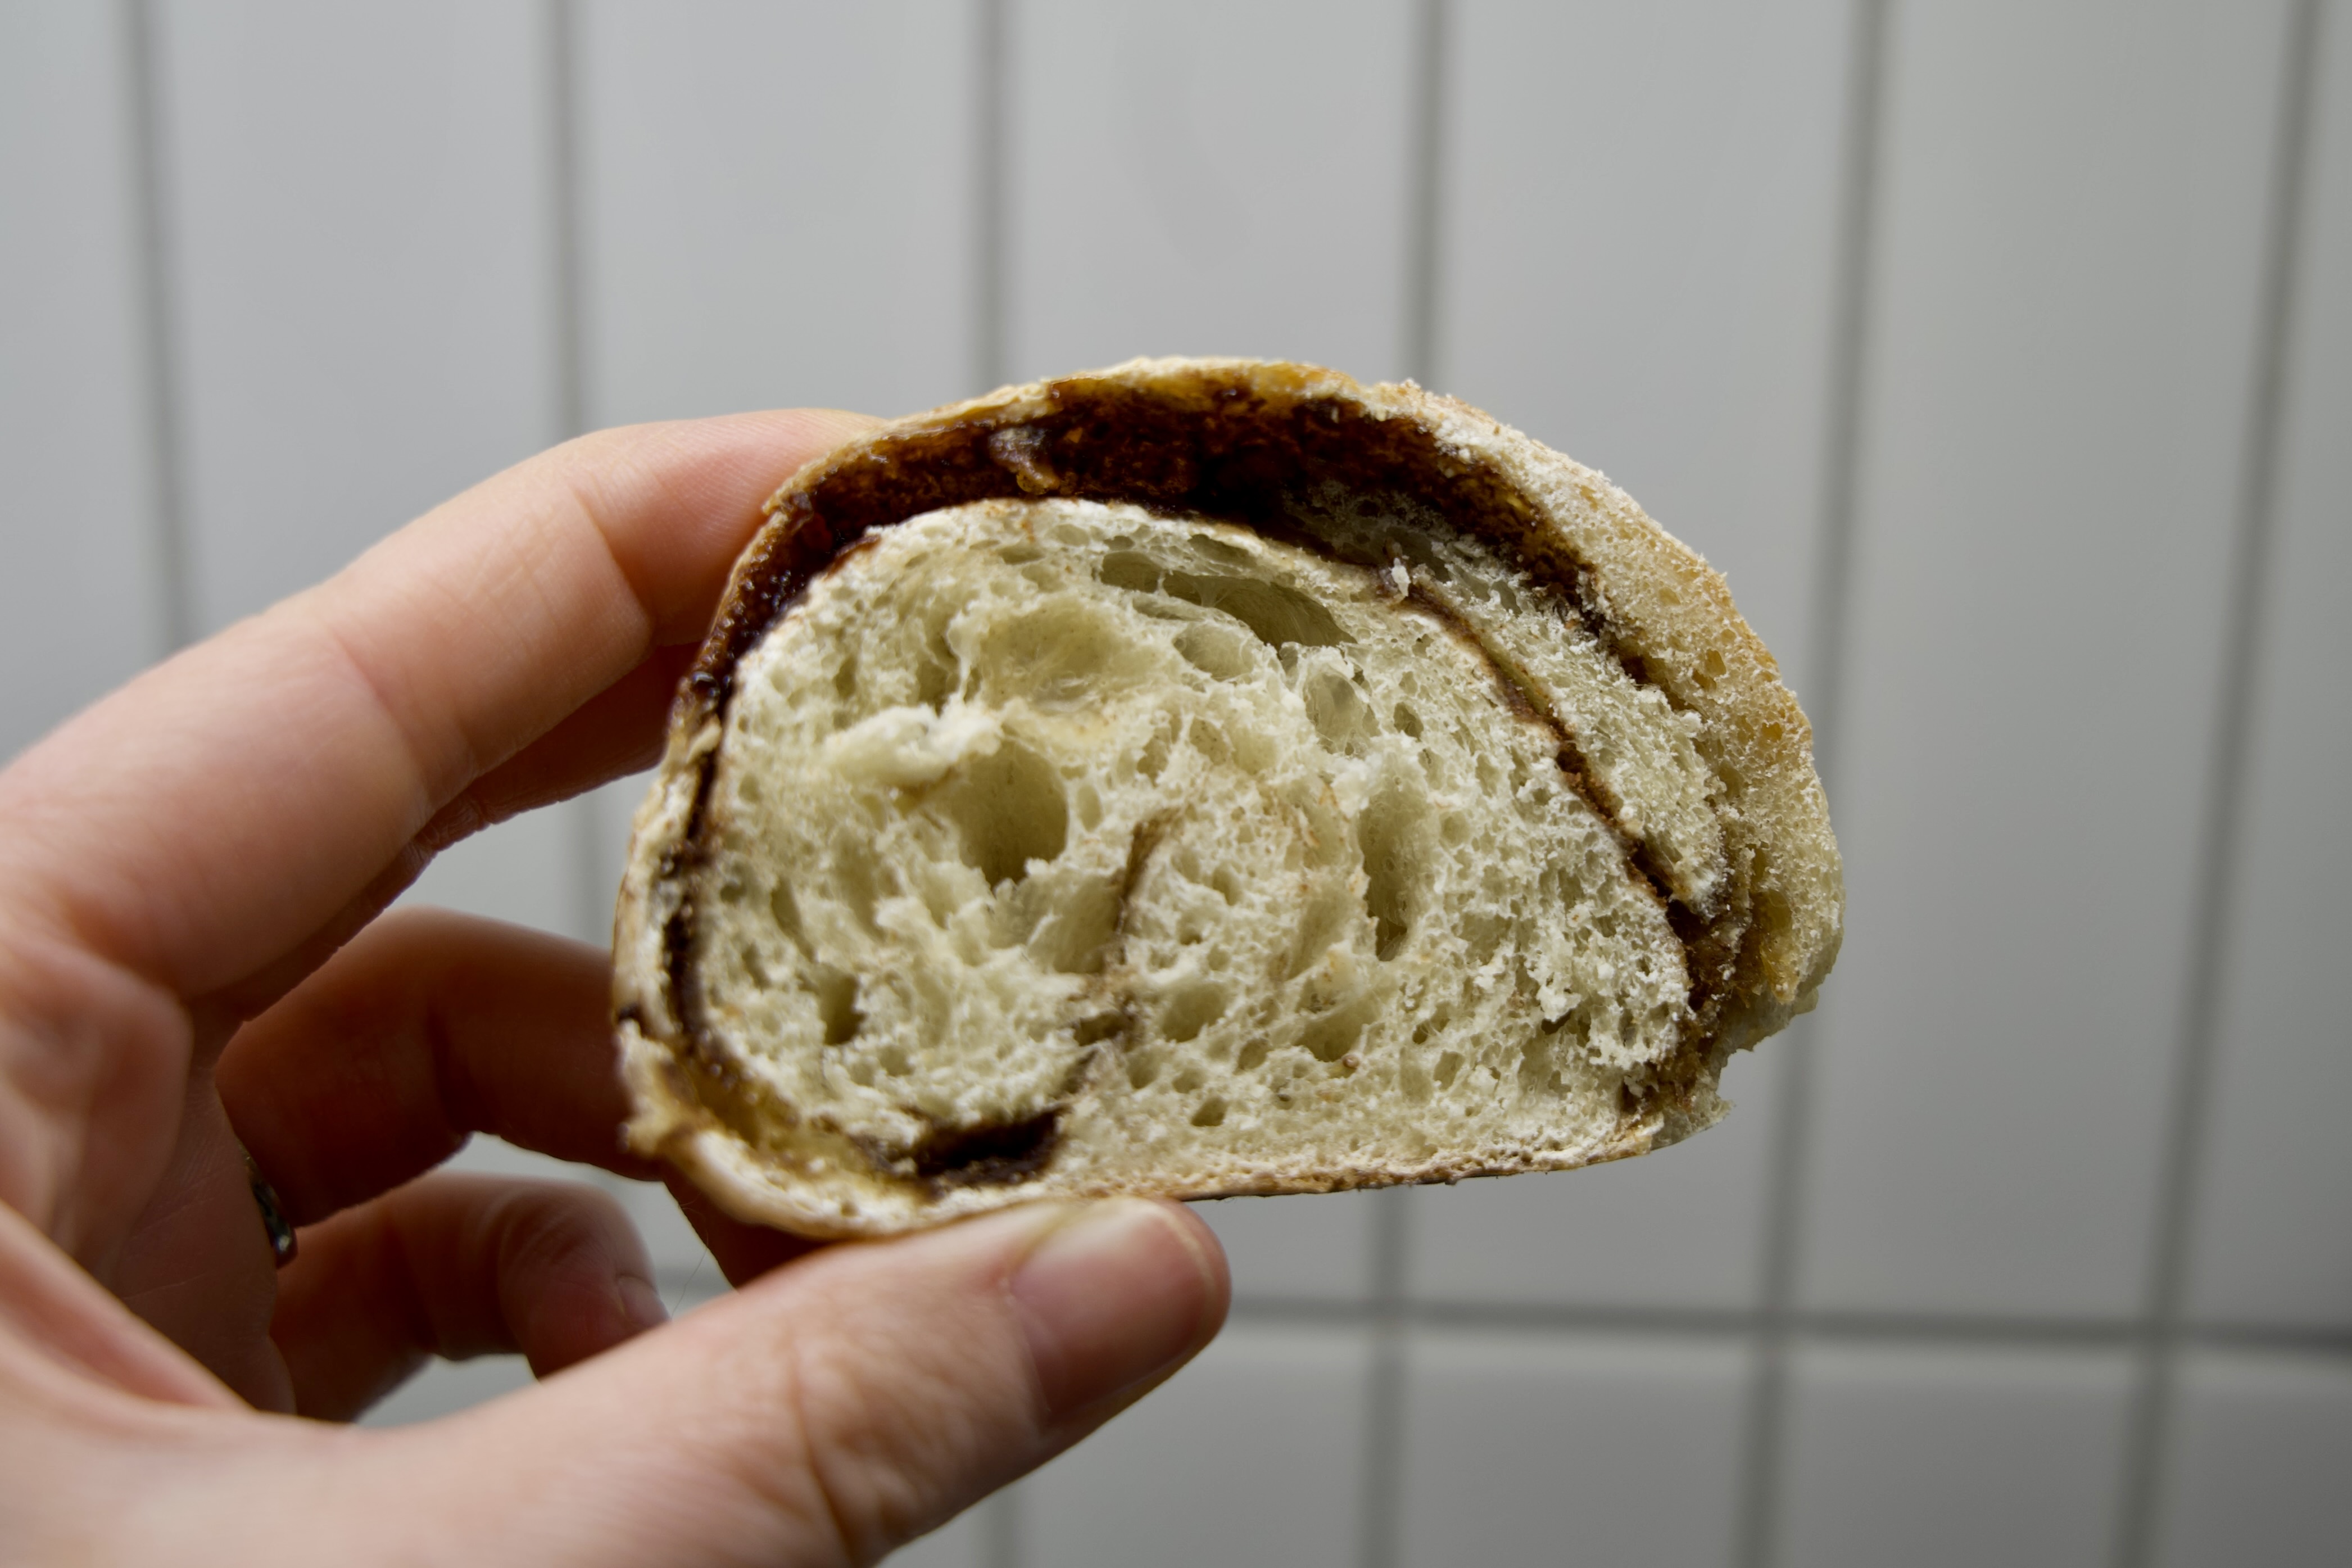
After a forced cooling period, I was greeted by a sticky, bubbling brown sugar syrup. The result? Surprisingly delicious mini-loaves that were perfect after a few seconds in the microwave. My husband approved! The real win? For the first time in ten years, the starter didn't just survive—it thrived.

Join the Reset: Stop Guessing, Start Baking
If you’ve been staring at a jar of stagnant flour and wondering why the "standard" rules aren't working for you, it’s time to stop following and start auditing.
Your Challenge: Grab a dry erase marker and mark your jar today. If your starter isn't doubling, don't just dump it—audit it! Ask Gemini to help you adjust your hydration for your specific kitchen temperature.
Have you ever "hacked" your sourdough process with a bread machine or a microwave incubator? Tell me your favorite hardware hack in the comments below!

Comments
No comments yet. Be the first to share your thoughts!